Mint is a heavy feeder by herb standards, and it runs on nitrogen above everything else. Oregon State Univ. Extension, soil sampling depth and testing guidance (EM 9057 and related extension sampling guides) notes that Reliable soil‑testing protocol (sample depth, timing, handling) for garden herbs/mint: collect representative composite samples (10–15 cores) from the target management area; for vegetable/herb beds sample 0–6 in (0–15 cm) depth; for established perennial beds 0–6 or 0–8 in; avoid very wet soils, avoid sampling within 6–8 weeks of recent lime/fertilizer, mix subsamples in a clean plastic bucket, air dry and submit 1–2 cups to a university extension or accredited lab; retest every 2–3 years or when making major changes Oregon State Univ. Extension — soil sampling depth and testing guidance (EM 9057 and related extension sampling guides). For vigorous leafy growth and strong flavor, mint needs a steady supply of nitrogen (N), phosphorus (P), and potassium (K), backed up by micronutrients like iron, manganese, zinc, boron, copper, and molybdenum. The sweet spot for soil pH is 5.5 to 6.5 in garden beds and 6.0 to 7.0 in containers. Get those numbers right, feed on a consistent schedule, and mint will grow faster than you can use it.
What Nutrients Does Mint Need to Grow: Complete Feeding Plan

Quick summary: what nutrients mint needs
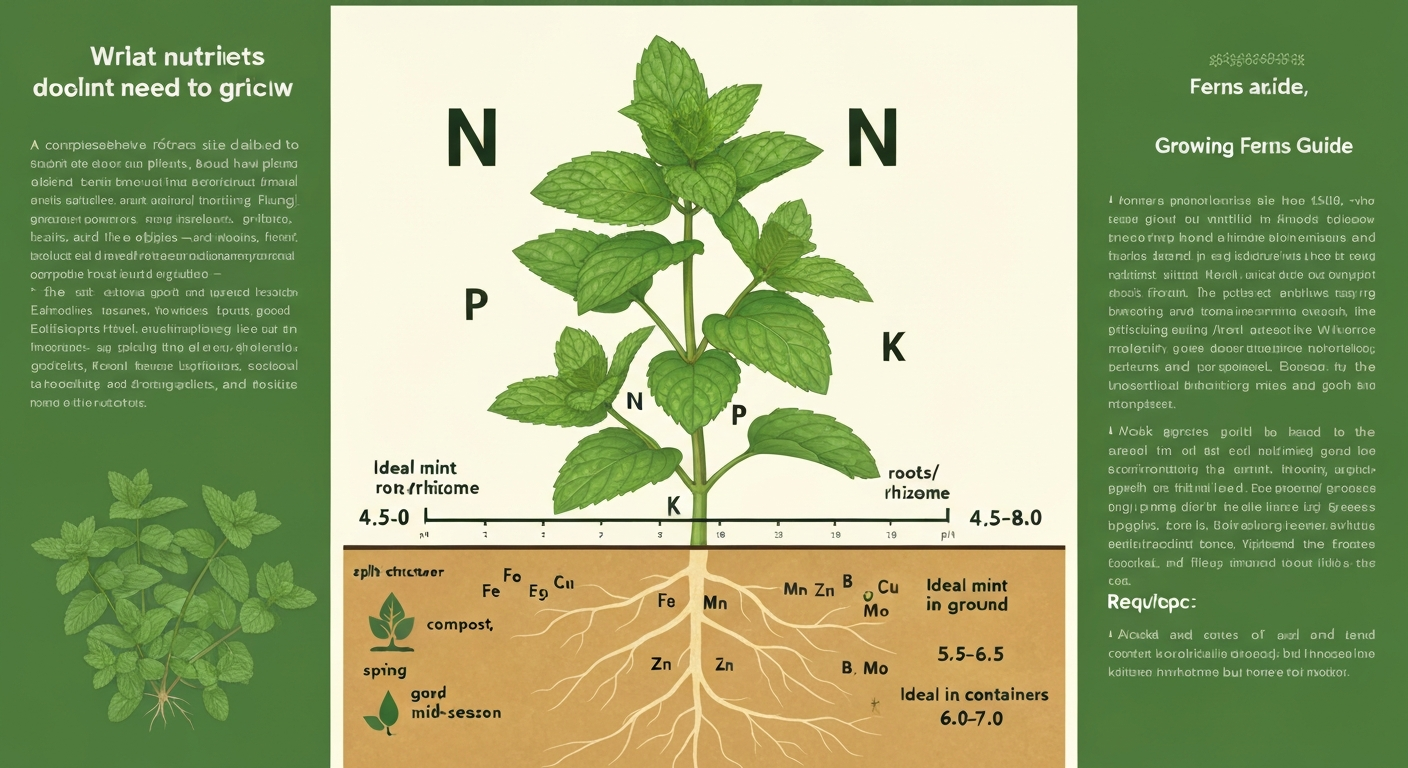
Before getting into the detail, here is a practical snapshot of what mint actually requires. Nitrogen drives the leafy, aromatic growth you are harvesting. Phosphorus builds roots and supports early establishment. Potassium governs water movement and disease resistance. Below those three are a supporting cast of micronutrients that become limiting mostly when pH is off, phosphorus is over-applied, or drainage is poor.
| Nutrient | Role in mint | Deficiency sign | Priority |
|---|---|---|---|
| Nitrogen (N) | Leaf and stem growth, oil production | Yellowing of older leaves, stunted growth | High |
| Phosphorus (P) | Root development, energy transfer | Purplish tint on leaves, poor rooting | Medium |
| Potassium (K) | Water regulation, stress tolerance | Scorched or brown leaf margins | Medium-High |
| Iron (Fe) | Chlorophyll synthesis | Interveinal chlorosis on young leaves | Medium |
| Manganese (Mn) | Photosynthesis, enzyme activation | Mottled yellowing between veins | Medium |
| Zinc (Zn) | Hormone and oil synthesis | Small, distorted new leaves | Low-Medium |
| Boron (B) | Cell wall formation, flowering | Distorted growing tips, hollow stems | Low |
| Copper (Cu) | Enzyme function | Wilting tips, pale young growth | Low |
| Molybdenum (Mo) | Nitrogen metabolism | Cupping or rolling of leaves | Low |
Macronutrients explained: nitrogen, phosphorus, and potassium
Nitrogen: the growth engine
Nitrogen is the nutrient mint will drain from your soil fastest. It directly fuels the leafy, aromatic biomass that makes mint worth growing. In commercial peppermint and spearmint production, extension guides from Purdue and the Midwest Vegetable Production network recommend a total seasonal nitrogen input of roughly 125 to 200 lb per acre (approximately 14 to 22 g per square meter), always split into at least two applications. The first goes in at crop emergence, and the second when plants reach about 10 to 12 inches (25 to 30 cm) tall. That split approach matters because it reduces nitrogen leaching and delivers the nutrient exactly when the plant is in rapid vegetative surge. For a home gardener that translates to an early-spring feed and a follow-up in late spring or early summer once stems are visibly stretching.
Phosphorus: roots first, then back off
Phosphorus is most important during establishment, when mint is developing the rhizome network that will feed the plant for years. Commercial programs typically apply around 100 lb P2O5 per acre as a preplant incorporation (roughly 11 g P2O5 per square meter). After the first year, maintenance rates drop significantly, often to around 50 lb P2O5 per acre annually, because phosphorus accumulates in the soil over time. One thing I have learned the hard way: over-applying phosphorus does active harm. High soil P locks up iron, manganese, and zinc through chemical antagonism, leading to deficiency symptoms even when those micronutrients are present in the soil. Run a soil test before adding any phosphorus beyond your starter dose.
Potassium: more than you might expect
Potassium requirements for mint are surprisingly high relative to most culinary herbs. Commercial recommendations run as high as 400 lb K2O per acre (roughly 44 g K2O per square meter) for a maintenance program, with annual additions of 100 to 150 lb K2O per acre in subsequent seasons. Potassium governs how water moves through the plant, how well it tolerates drought stress, and how resistant it is to fungal diseases. Potassium-deficient mint shows characteristic scorched or brown margins on older leaves first. If you see that, do not assume drought stress without checking your soil numbers.
Ideal NPK ratios for home growers
For most home gardeners and container growers, a balanced granular fertilizer in the 10-10-10 range works well at establishment, followed by a nitrogen-forward feed (something like 20-10-10 or fish emulsion at 5-2-2) during the main vegetative season. The field data above can be scaled down using the conversion that 1 acre equals 4,046.86 square meters. A 10-inch (25 cm) container has a root-zone area of roughly 0.051 square meters, so the equivalent preplant phosphorus from the field rate works out to about 0.57 g P2O5 per pot, and the nitrogen need across the season is roughly 0.85 g N per pot. These are arithmetic floor numbers, not prescriptions; always adjust based on what your soil test tells you.
Micronutrients mint needs and what their absence looks like
Micronutrients are needed in small quantities but they are not optional, especially when mint is growing hard and producing the essential oils that give it its characteristic flavor. These nutrients act as cofactors in photosynthesis and in the biochemical pathways that build terpenes and other aromatic compounds. When they go missing, yield drops and flavor suffers before the plant even looks obviously sick.
- Iron (Fe): Interveinal chlorosis on young leaves is the classic sign. The leaf tissue between the veins turns yellow while the veins stay green. This symptom appearing on new growth (rather than old) is the key diagnostic clue. Sufficiency range in plant tissue is approximately 10 to 150 ppm. Most often triggered by high pH (above 7.0) or excessive phosphorus, not an actual absence of iron in the soil.
- Manganese (Mn): Causes a mottled, checkered yellowing pattern similar to iron but usually less dramatic. Appears first on young to mid-canopy leaves. Tissue sufficiency is roughly 5 to 50 ppm. Also pH-sensitive and suppressed by over-liming.
- Zinc (Zn): Shows as small, distorted new leaves and shortened internodes (the stem sections between leaves). In mint, zinc is also involved in the oil-synthesis pathway, so a mild deficiency can reduce fragrance before visual symptoms become obvious. Tissue range approximately 20 to 100 ppm.
- Boron (B): Affects cell division and is essential during flowering. Deficiency causes distorted or dead growing tips and, in severe cases, hollow or cracked stems. Tissue sufficiency approximately 20 to 70 ppm. Both deficiency and toxicity windows are narrow, so do not apply boron without a confirmed test.
- Copper (Cu): Deficiency causes tip wilting and a pale, bluish-green color in young growth. Tissue sufficiency is roughly 5 to 15 ppm. More likely to be an issue in highly organic, peaty soils where copper binds tightly to organic matter.
- Molybdenum (Mo): Involved in nitrogen metabolism inside the plant, so deficiency often looks like nitrogen deficiency. Leaves may cup or roll inward. Mo availability actually increases as pH rises, making it the one micronutrient that often benefits from slightly higher pH.
A word of caution I repeat to anyone asking me about yellowing mint: visual symptoms are not enough to diagnose a deficiency with confidence. Waterlogged roots, aphid feeding, spider mites, and fungal infections all produce leaf discoloration that overlaps with nutrient problems. Always pair visual diagnosis with a soil or tissue test before applying corrective treatments. Land-grant extension plant diagnostic clinics (University of Minnesota, UC ANR, Cornell, and others) maintain photo galleries that are genuinely helpful for narrowing down the cause.
How to test your soil and make sense of the results
Taking a soil sample properly
A soil test is only as good as the sample you send. For herb beds and garden mint, sample to a depth of 0 to 6 inches (0 to 15 cm). For an established perennial mint bed, going to 6 to 8 inches is reasonable. Collect 10 to 15 soil cores from across the area you want to understand, using a clean trowel or soil probe, and combine them in a clean plastic bucket. Mix the subsamples thoroughly, air dry the combined sample at room temperature (do not use a microwave or oven), and submit 1 to 2 cups to a university extension or accredited private laboratory. Avoid sampling within 6 to 8 weeks of a recent lime or fertilizer application, as the numbers will not represent your stable baseline. Oregon State Extension's sampling guidance recommends retesting every 2 to 3 years under a consistent management program, or any time you make a major change in inputs.
Home kit vs. extension lab: which to use
Home colorimetric kits give you a rough pH indication and a coarse low-medium-high reading for NPK. They are fine for a quick sanity check. But university evaluations have consistently shown that home kits are unreliable for quantifying phosphorus and potassium accurately enough to calculate a fertilizer recommendation. If you are deciding how much lime to add, whether to correct a micronutrient deficiency, or setting up a multi-year feeding program, spend the $15 to $30 on a proper lab test. A university extension lab will return calibrated numeric values for pH, phosphorus, potassium, calcium, magnesium, organic matter, cation exchange capacity (CEC), and a lime recommendation. Many also offer micronutrient panels for an extra fee, which is worth adding if your mint has shown any of the deficiency symptoms described above.
Reading the results
The two numbers to anchor everything else to are soil pH and organic matter. Target pH 5. NC State Extension Gardener Plant Toolbox, Mentha x piperita (peppermint) recommends mint grow best in near‑neutral to mildly acidic soil (about pH 6.0–7.0) NC State Extension Gardener Plant Toolbox — Mentha x piperita (peppermint). 5 to 6.5 for in-ground mint and 6.0 to 7.0 for containers. Within those ranges, iron, manganese, and zinc remain soluble and available. Phosphorus, potassium, calcium, and magnesium numbers are reported as pounds per acre or parts per million depending on the lab, and the report will usually include a rating (low, medium, high) and a fertilizer recommendation. If your report shows high P but low Fe or Mn, that phosphorus excess is almost certainly suppressing micronutrient uptake. The CEC number tells you how much nutrient-holding capacity your soil has: a high CEC (above 15 meq/100g) means the soil can store more nutrients between applications, and a low CEC (common in sandy soils) means you should feed more frequently at lower rates.
Adjusting soil pH and structure to unlock nutrients
Nutrient availability in soil is controlled by pH more than almost any other single factor. Even if all the right nutrients are present, an out-of-range pH will tie them up chemically and starve your mint. I have seen beautifully amended garden beds produce chlorotic, stunted mint simply because the pH was sitting at 7.5 after years of hard tap water irrigation.
Raising pH with lime
If your soil pH is below 5.5, calcitic or dolomitic agricultural limestone is the standard fix. Dolomitic lime adds magnesium alongside calcium, which is useful if your Mg levels are also low. The amount of lime needed is not a flat rate: it is calculated from the buffer pH (or SMP buffer test) that your extension lab runs alongside the standard pH test. Apply lime at least several months before planting, ideally in fall for a spring crop, because it takes time to react with soil particles. Incorporate it into the top 6 inches if you are preparing a new bed.
Lowering pH with sulfur or acidifying amendments
If pH is above 6.5 (or above 7.0 in a container situation) and you are seeing iron or manganese chlorosis, elemental sulfur is the go-to corrective. It reacts slowly, taking weeks to months depending on soil temperature, moisture, and microbial activity, so plan ahead. The rate depends on soil texture and how far you need to move the pH: sandy soils need less, heavy clay soils need more. Never guess at the rate; use your lab's lime requirement test in reverse, or ask the lab to provide a sulfur recommendation alongside pH correction. For containers, switching to a sulfur-acidified potting mix, or watering occasionally with a dilute acidifying fertilizer, is often more practical than applying elemental sulfur.
Improving soil structure and drainage
Mint tolerates moist soil but not waterlogged roots, and waterlogging causes nutrient uptake to collapse even when pH and fertility are perfect. The roots simply cannot function without oxygen. In heavy clay soils, incorporate 2 to 4 inches of coarse compost or aged wood chips into the bed before planting to open up the structure. Raised beds are an excellent solution for clay gardens and they also make it easier to control pH in a small volume of soil. For containers, use a well-draining potting mix and make sure drainage holes are unobstructed. Drainage interacts directly with how nutrients are managed, so if you want to go deeper on the full set of growing conditions mint prefers, the conditions article in this series covers drainage, light, and temperature in detail.
Soil amendments and organic matter: composts, manures, and biochar
Getting the chemistry right is only part of the picture. Soil biology and physical structure also govern how well mint roots can explore the soil and take up what is there. Organic amendments address all three dimensions at once.
Compost
Well-rotted compost is the single most reliable amendment for mint. It improves water retention in sandy soils, improves drainage in clay soils, feeds soil microbes, and provides a slow trickle of NPK and micronutrients. Extension guidance for garden beds suggests topdressing 1 to 3 inches (2.5 to 7.5 cm) of compost per year, working it into the topsoil for new beds and leaving it as a surface mulch for established perennial plantings. For containers, start with a potting mix that contains 20 to 30 percent compost by volume and plan on supplemental liquid fertilizer because the nutrient reserves in compost deplete relatively quickly in the confined space.
Manures
Aged or composted manure (chicken, cow, horse) adds nitrogen, phosphorus, and potassium along with micronutrients and organic matter. Chicken manure is the most nitrogen-dense of the common options. The key is aged or well-composted: fresh manure can burn roots and may carry pathogens that are a food-safety concern for herbs you are eating. Apply composted manure in fall or early spring, worked in at about 1 to 2 inches per application. Watch phosphorus accumulation over years of manure use, particularly with chicken manure, and run a soil test every two to three years to track it.
Biochar
Biochar is a slow-pyrolysis charcoal product added to soil primarily to improve cation exchange capacity and water retention over the long term. It is not a fertilizer by itself and contains minimal available nutrients, but when combined with compost (charged biochar) it can increase the soil's ability to hold applied nutrients and reduce leaching. Rates of 5 to 10 percent by volume incorporated into the top 6 inches are commonly cited for garden beds. It is a useful long-term investment for sandy, low-CEC soils, but not a substitute for regular fertilization.
Fertilizing timing and methods: how to actually feed your mint
There is no single right method for fertilizing mint. The approach depends on whether you are growing in a container, a raised bed, or a field, and whether you are using organic or synthetic inputs. The principles are consistent though: match timing to the plant's active growth periods, split applications to reduce waste and risk of burn, and adjust rates to what a soil test tells you the plant actually needs.
Slow-release granular fertilizers
Slow-release coated granular fertilizers (like polymer-coated urea or Osmocote-type products) are ideal for containers and raised beds because they deliver nutrients gradually over 3 to 6 months, matching the plant's uptake rate and reducing the chance of salt buildup or leaching. Apply at planting time by mixing into the top inch of soil or potting mix. For containers, one application at the start of the growing season is often enough for the first flush of growth, with a liquid supplement mid-season if plants begin to look pale.
Granular broadcast and side-dressing
For in-ground beds, broadcast granular fertilizer (like 10-10-10) across the bed surface in early spring and rake it in before growth starts. Side-dressing, which means applying a narrow band of fertilizer along the rows or around plant bases mid-season, is an effective way to add a nitrogen boost without disturbing roots. Apply a side-dress of blood meal, ammonium sulfate, or a balanced granular around 10 to 20 g N per square meter when plants are 6 to 8 inches tall and actively growing.
Liquid feeds and fertigation
Liquid fertilizers (fish emulsion, liquid seaweed, balanced NPK liquids) are fast-acting and ideal for mid-season corrections or for container plants that need more frequent feeding. University of Minnesota extension guidance recommends feeding container mint at half the label strength every 3 to 4 weeks during active outdoor growth, and every 6 weeks or so when growing indoors in lower light. The lower-light indoor context matters because mint that is not growing hard does not need much nitrogen, and over-feeding an indoor plant produces soft, weak, less aromatic growth.
Foliar sprays
Foliar feeding, spraying a dilute nutrient solution directly onto leaves, is most useful for correcting micronutrient deficiencies quickly. Chelated iron sprays applied at label rates can resolve iron chlorosis within days when soil-based correction is too slow (or impractical in containers). Zinc and manganese foliar sprays are similarly effective for their respective deficiencies. Foliar feeding is not a substitute for healthy soil fertility; think of it as targeted triage. Always apply foliar sprays in early morning or evening to avoid leaf burn, and verify the diagnosis with a soil or tissue test before applying anything repeatedly.
Sample feeding plans by growth stage and setup
The plans below are practical starting points, not rigid prescriptions. Adjust based on your soil test results, the vigor of your plants, and your local climate. Mint growing in a warm, long season will need more total nutrition than the same plants in a short northern summer.
Container mint (organic, culinary use)
- At potting: fill with a quality potting mix containing 20 to 30 percent compost. Mix in a small amount of slow-release granular fertilizer (follow label for container rates, typically 1 to 2 teaspoons per 6-inch pot).
- Starter phase (weeks 1 to 3): no additional fertilizer needed while the plant establishes roots.
- Maintenance phase (week 4 onward): apply half-strength fish emulsion (5-2-2) every 3 to 4 weeks throughout active growth. Approximately 0.85 g of total nitrogen per 10-inch pot per season is the arithmetic minimum derived from field extension rates, but split liquid applications make that more available.
- Mid-season vigor boost: if growth slows or leaves pale, apply one dose of a seaweed and fish blend at full label strength, then return to half-strength maintenance.
- End of season (before first frost or when bringing indoors): stop fertilizing 4 to 6 weeks before the plant goes dormant or moves to low-light indoor conditions.
Home raised bed or garden plot
- Fall or early spring before planting: incorporate 2 inches of well-rotted compost and, if the soil test indicates, the lab's recommended lime or sulfur rate. Allow lime at least 4 to 6 weeks to react before planting.
- At planting (starter): broadcast approximately 120 g (about half a cup) of balanced 10-10-10 granular per square meter and rake in. This covers preplant phosphorus and potassium needs and gives a light nitrogen starter.
- When plants reach 6 to 8 inches: side-dress with 10 to 15 g N per square meter as blood meal (organic) or ammonium sulfate (synthetic). Water in thoroughly.
- When plants reach 10 to 12 inches and are growing vigorously: second N application at the same rate, or apply half-strength liquid fertilizer as a drench.
- After each major harvest: apply a light liquid feed (half-strength balanced or nitrogen-forward) to fuel regrowth. Mint re-sprouts vigorously and benefits from a feed within a week of a hard cut.
Commercial or large-scale production (extension field rates)
| Application timing | Nutrient | Rate (field scale) | Rate (g per m²) |
|---|---|---|---|
| Preplant incorporation | P2O5 | 100 lb/acre | ~11.2 g/m² |
| Preplant incorporation | K2O | 400 lb/acre (maintenance) | ~44.5 g/m² |
| At crop emergence (split 1) | N | ~65–100 lb N/acre | ~7–11 g N/m² |
| At 10–12 inches height (split 2) | N | ~60–100 lb N/acre (balance of total) | ~7–11 g N/m² |
| Annual maintenance (subsequent seasons) | P2O5 | ~50 lb/acre | ~5.5 g/m² |
| Annual maintenance (subsequent seasons) | K2O | 100–150 lb/acre | ~11–16.5 g/m² |
These field rates from Purdue Extension and the Midwest Vegetable Production Guide are for commercial peppermint and spearmint grown for essential oil yield. Home gardeners will rarely need anything close to these quantities, but the ratios and timing logic translate directly: nitrogen split across at least two vegetative applications, phosphorus front-loaded at planting, and potassium maintained at a higher relative rate than most gardeners expect.
Flowering, seasonality, and how they affect nutrition
Mint's nutritional demands shift across the season in ways that are easy to miss. In early spring, phosphorus and a starter nitrogen dose support root development and the initial flush of new growth. Through late spring and early summer, nitrogen demand peaks as stems extend rapidly. Then something changes: when the days lengthen and temperatures rise, mint shifts energy toward flowering. The plant redirects resources from producing new leaves to building flower structures, and leaf production slows noticeably. If you are growing mint for culinary use, this is exactly when you want to harvest hard or pinch flowers off. Flowering mint produces leaves with lower essential oil concentration, which means less flavor per pinch. For more on when mint flowers and how blooms affect harvesting and flavor, see does mint grow flowers. For a detailed timeline of mint's growth stages and exact timing, see when does mint grow (resource ID ce16c639-2398-4fc4-a6ab-9ed567c2d642).
From a nutrition standpoint, the transition to flowering also marks the point where nitrogen applications should taper. Heavy nitrogen feeding during or after flowering encourages rank vegetative growth at the expense of oil quality, and in late summer it pushes soft growth that is more vulnerable to frost damage. If you want to understand more about when exactly this transition happens and what to expect at each growth stage through the year, that is covered in detail in the seasonal growth article in this series.
After you cut mint back hard following the first flowering flush, the rhizomes push fresh growth from the base, and that is when a post-harvest liquid feed pays dividends. Think of each harvest cut as a reset: the plant is essentially starting its vegetative phase again, and it benefits from the same nitrogen-forward approach you used in spring.
How mint's needs compare to dill
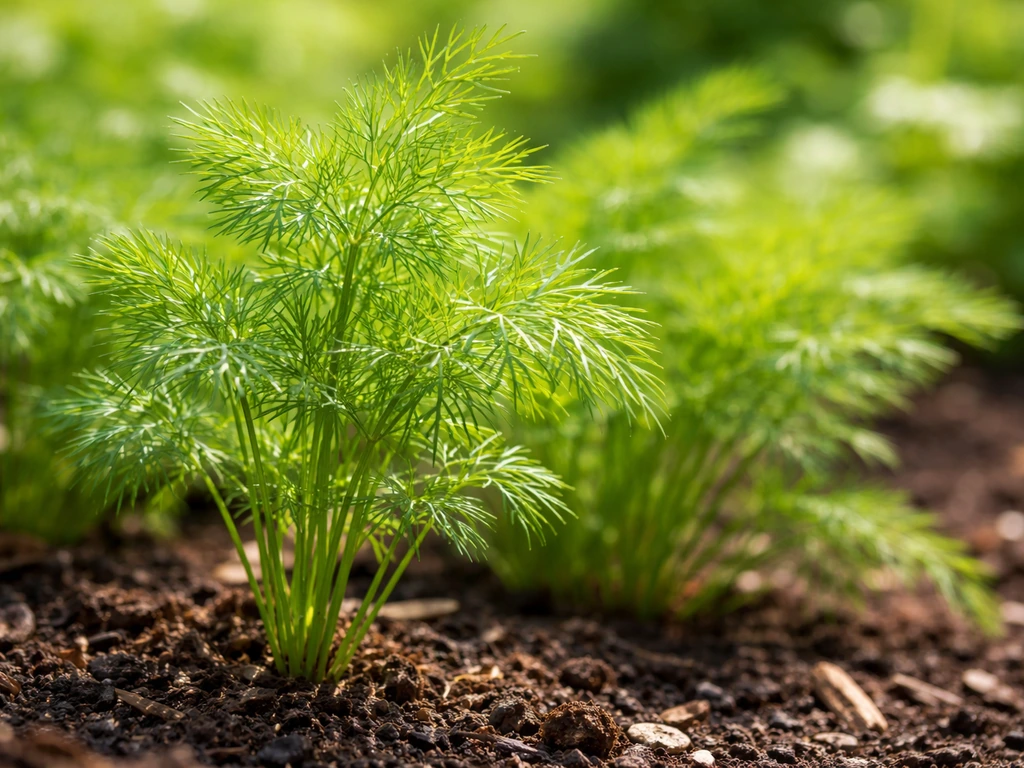
If you are deciding whether to plant mint and dill together or choosing between them for a limited space, understanding the nutritional and structural differences matters. Mint is a perennial that spreads via underground rhizomes and builds up a persistent root system. Dill is an annual that germinates, grows, flowers, sets seed, and dies in a single season. This difference alone means their feeding approaches diverge significantly.
| Factor | Mint | Dill |
|---|---|---|
| Life cycle | Perennial (hardy to USDA zone 3–8 depending on variety) | Annual |
| Ideal soil pH | 5.5–6.5 (garden); 6.0–7.0 (container) | 5.5–6.5 |
| Nitrogen demand | High, split seasonal applications | Moderate, single light application |
| Phosphorus demand | Medium (higher at establishment) | Low-medium |
| Potassium demand | High (especially commercial production) | Moderate |
| Spreading habit | Aggressive rhizome spread (contain or manage) | Clump, self-seeds |
| Fertilizer approach | Regular split feeds through growing season | Light single dose or compost only |
| Micronutrient sensitivity | High when pH is off (Fe, Mn, Zn) | Moderate |
Dill is notably more forgiving with fertility, and it actually performs better in slightly leaner soil: too much nitrogen makes dill go to flower quickly and reduces the density of foliage. Mint, by contrast, needs consistent feeding to sustain its aggressive growth. They can coexist in the same garden, but I would not grow them in the same raised bed, mostly because mint will outcompete almost anything in close quarters within two seasons. The conditions article for dill in this series goes into its specific soil and environment preferences in more depth. For details on what conditions dill needs to grow, read the dill conditions article in this series what conditions does dill need to grow.
Troubleshooting quick reference
When something goes wrong with mint, most problems fall into a handful of categories. Here is a fast diagnostic rundown to narrow it down before you reach for any amendments or sprays.
| Symptom | Most likely cause | First step | Treatment |
|---|---|---|---|
| Uniform yellowing, older leaves first | Nitrogen deficiency | Confirm with soil test | Apply liquid N feed at half-strength; repeat in 3 weeks |
| Interveinal yellowing on youngest leaves | Iron or manganese deficiency | Check pH (likely above 6.5) | Lower pH; apply chelated Fe foliar spray |
| Purple or reddish tint on undersides | Phosphorus deficiency or cold stress | Soil test for P; check nighttime temps | Add P fertilizer only if confirmed by test |
| Brown scorched margins on older leaves | Potassium deficiency or salt buildup | Soil test for K; flush containers | Apply K fertilizer; reduce salt load in containers |
| Distorted or dead growing tips | Boron deficiency | Tissue test to confirm | Apply borax at very low rate (only with confirmed test) |
| Pale, wilting tips despite moist soil | Copper deficiency or root rot | Check drainage; soil test for Cu | Improve drainage; chelated Cu spray if confirmed |
| Stunted growth, healthy color | Compaction, pH issue, or waterlogging | Check drainage and run soil test | Aerate, correct pH, improve drainage |
| Heavy growth, poor flavor/aroma | Excessive nitrogen or flowering stage | Reduce N; check if plant is flowering | Cut back hard, reduce feed, pinch flowers |
One myth worth addressing directly: more fertilizer does not mean more flavor. Mint's essential oil concentration is partly a genetics question and partly about managed stress. Hard harvests, adequate but not excessive nitrogen, full sun, and well-drained soil consistently produce more aromatic, flavorful leaves than a heavily fertilized plant growing in rich, wet conditions. Feed mint well enough to grow vigorously, test your soil every two to three years, and let the plant tell you when something is off.
FAQ
What macronutrients does mint need and in what amounts (garden vs. commercial)?
Mint needs nitrogen (N), phosphorus (P) and potassium (K) plus secondary macronutrients calcium (Ca), magnesium (Mg) and sulfur (S). For commercial stands extension guides commonly recommend roughly 125–200 lb N/acre (split applications), ~100 lb P2O5/acre preplant and ~400 lb K2O/acre (maintenance), with actual rates set by soil test. For home beds and containers scale those rates down (1 acre = 4046.86 m²): commercial N ≈ 16.8 g N·m⁻² for 150 lb/acre; P2O5 ≈ 11.2 g·m⁻² for 100 lb/acre. Containers require much lower, more frequent feeding (see sample plans). Adjust N for vigorous leaf growth (higher N) and reduce before harvests intended for essential oil quality as advised by your extension guidance.
Which micronutrients are important for mint and how do deficiencies show?
Key micronutrients: iron (Fe), manganese (Mn), zinc (Zn), boron (B), copper (Cu) and molybdenum (Mo). Also monitor Ca, Mg and S. Typical deficiency symptoms: N deficiency causes overall chlorosis and stunting; P deficiency slows growth and can darken older leaves; K deficiency causes marginal scorching/necrosis and weak stems; Fe or Mn deficiency produces interveinal chlorosis on new leaves (Fe on young leaves); Mg deficiency causes interveinal chlorosis on older leaves; Zn deficiency can cause small leaves and shortened internodes. Because pests, disease or water stress can mimic these, confirm with soil and/or tissue testing before corrective treatment.
How should I test soil and plant tissue for nutrient problems?
Collect representative composite soil samples (10–15 cores) from the root zone (0–6 in / 0–15 cm for herb beds). Air‑dry and submit 1–2 cups to a university extension or accredited lab for pH, extractable P, K, Ca, Mg, buffer pH (lime requirement), organic matter, CEC and optionally micronutrients. For in‑season diagnosis collect young fully expanded leaves (or stem tissue as per lab instructions) for tissue analysis; compare results to sufficiency ranges. Home test kits give coarse pH/NPK categories but are unreliable for precise P/K/micronutrient decisions—use lab tests when planning lime or fertilizer rates.
What soil pH does mint prefer and how do I correct it?
Target pH: field/garden mint commonly 5.5–6.5; many container/culinary guidelines suggest ~6.0–7.0 for containers to avoid micronutrient tie‑up. If soil pH is low, apply agricultural lime (calcitic or dolomitic) per lab buffer pH recommendation—apply months before planting. To lower pH, use elemental sulfur at rates based on texture and buffer pH (works slowly over months). Always follow extension lab recommendations for tons/acre or grams/m² to avoid overcorrection.
How often and when should I fertilize mint (timing and methods)?
Containers: use a diluted balanced liquid fertilizer at half label strength every 3–6 weeks during active growth (every ~3–4 weeks outdoors). Home beds: apply a soil test‑based broadcast application in spring (base) and sidedress with N during the vegetative season. Commercial: split N—apply first at emergence and a second when plants reach ~10–12 in (25–30 cm); total N commonly 125–200 lb/acre. Use banding or incorporation for preplant P/K and sidedressing/foliar or fertigation for N during the season. Adjust frequency to growth intensity and soil organic matter.
Can you give sample feeding plans for different scales (container, bed, acre)?
Yes — examples (tune to soil test): 1) Container/culinary mint (organic): high‑quality potting mix + compost. Feed with fish emulsion 5‑2‑2 at half label strength every 3–4 weeks during active growth. 2) Home raised bed (~1 m²): incorporate 1–3 in compost at planting; apply ~120 g (≈1/2 cup) of 10‑10‑10 per m² at planting, then sidedress with 10–20 g N/m² midseason (blood meal or ammonium sulfate). 3) Commercial stand (example extension rates): 150 lb N/acre total split (emergence + 10–12 in), 100 lb P2O5/acre preplant, 400 lb K2O/acre maintenance. To convert field rates to a pot, use the area conversion (1 acre = 4046.86 m²) and scale grams per m² to pot area.
What Conditions Does Dill Need to Grow Successfully
Learn dill growing conditions: sun, temperature, soil, watering and feeding, plus planting steps, troubleshooting and bo