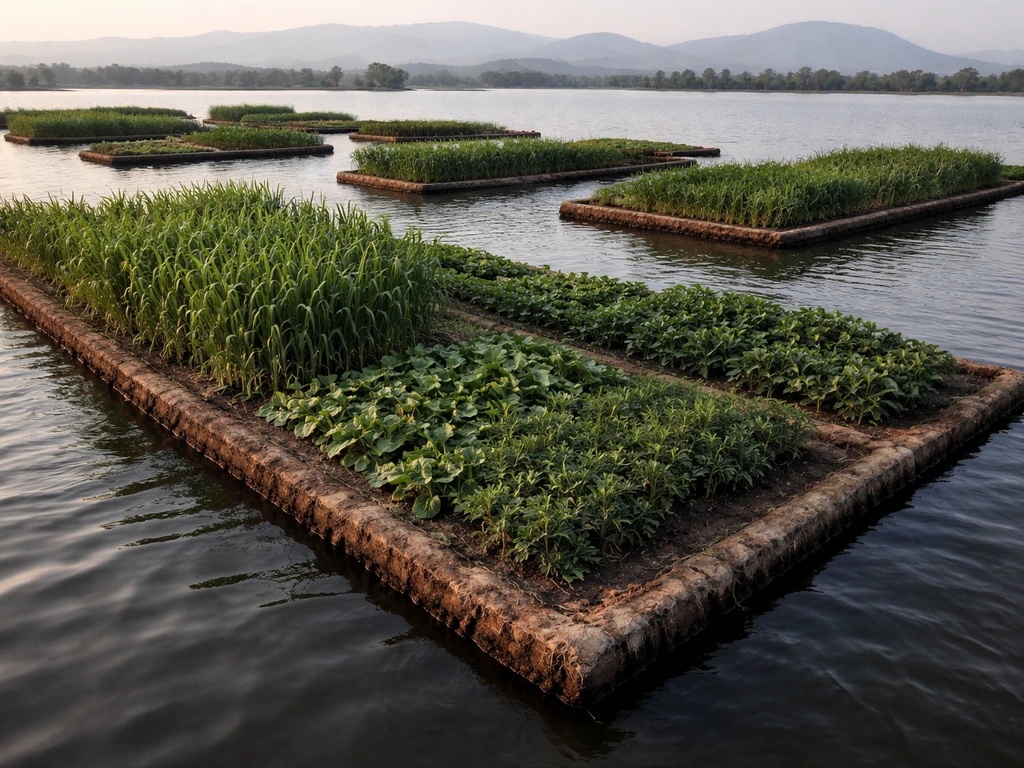
You can grow almost any small, fast-sprouting seed on a Chia Pet, not just chia. Alfalfa, radish, wheatgrass, basil, flax, and even lentils all work well on the terra cotta surface, each giving you a different look and timeline. The trick is matching the seed's moisture needs to how a Chia Pet actually delivers water, which is through slow, passive wicking from a reservoir, not overhead watering. Get that right, and you can cycle through a new green 'coat' every couple of weeks. On chinampas, the Aztecs grew crops on floating, planted rafts built on canals and lake beds Aztecs grew crops on chinampas.
What Else Can You Grow on a Chia Pet Today

Marcus Weir
6 May 2026
What a Chia Pet really needs to grow
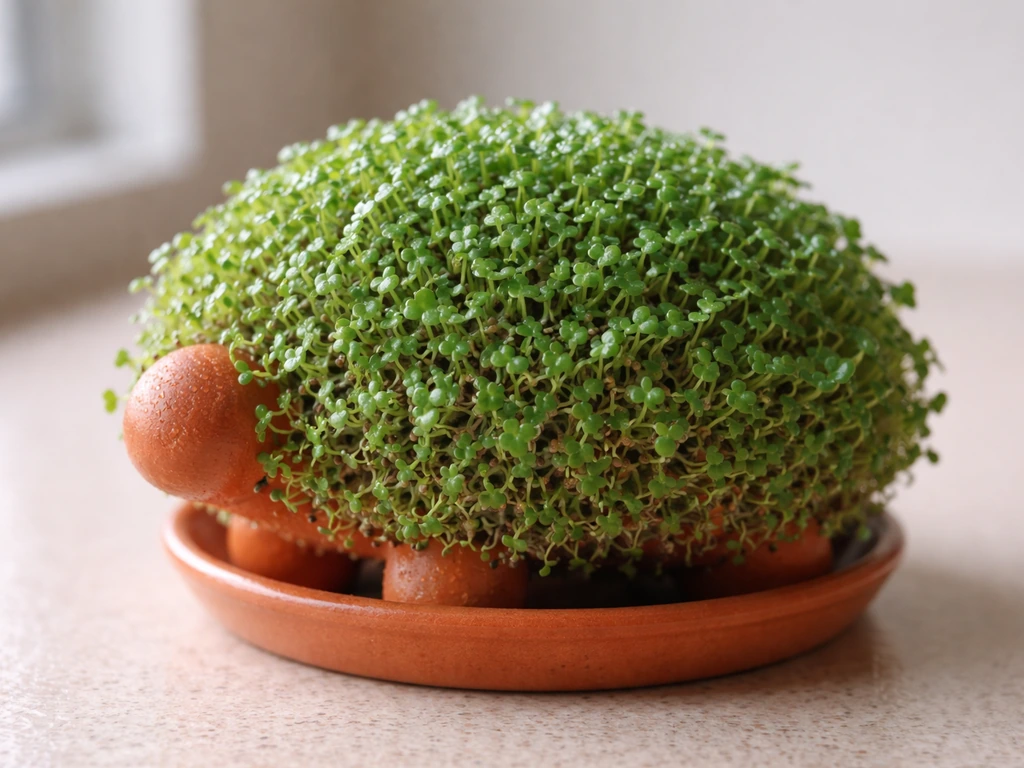
A Chia Pet is basically a porous clay vessel that keeps its outer surface slightly damp through capillary action. Seeds pressed onto that surface sit in a thin layer of moisture-rich paste and sprout through consistent humidity, not soil. Three things drive the whole system: seeds that germinate without soil and can grip a vertical or angled surface, a surface that stays consistently moist (not waterlogged, not dry), and indirect light warm enough to trigger germination, ideally 65 to 80 degrees Fahrenheit.
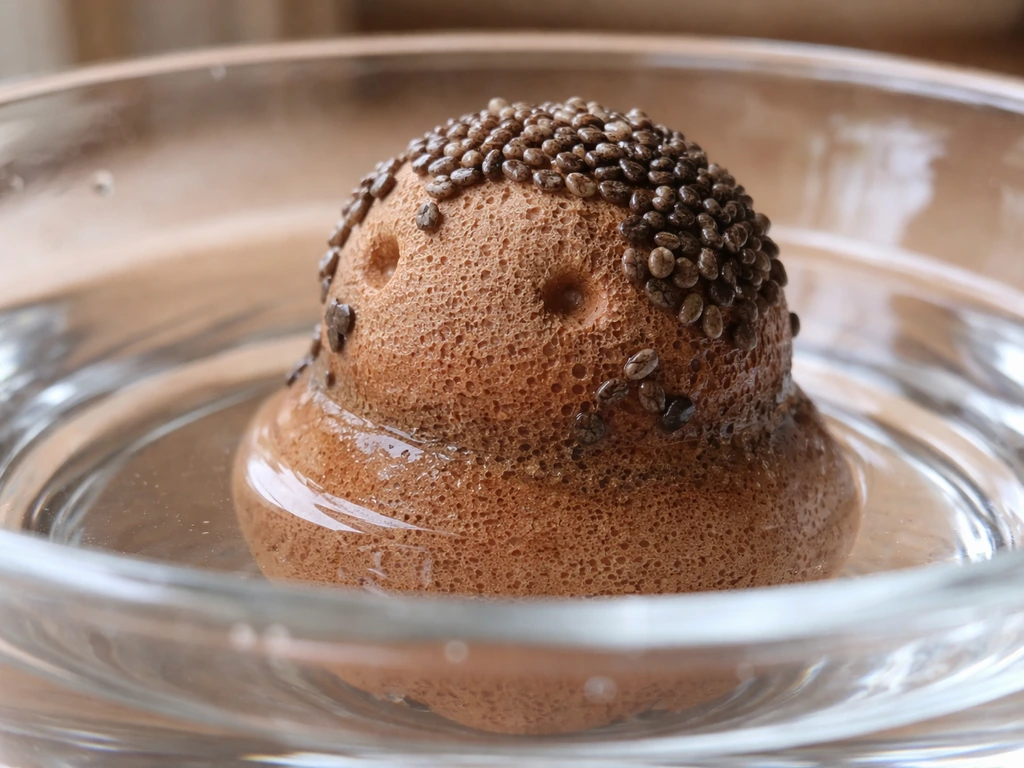
The official Chia Pet instructions call for submerging the entire figure in water for a full 30 minutes before you add any seeds. That pre-soak saturates the clay so it wicks water upward and outward steadily. After seeding, you keep the internal reservoir topped off and empty the drip tray as needed. If the clay dries out even briefly in the first few days, germination stalls and you often get uneven or failed sprouting. The seed layer itself needs to stay visibly moist but not dripping, which is why the seed-to-water ratio matters more than most people expect.
Best seeds to grow on a Chia Pet (other than chia)
The best alternatives share one key trait with chia: they produce a mucilaginous (gel-like) coating when wet, or they're sticky enough to cling to a curved surface without sliding off. Beyond that, you're looking for seeds that sprout fast and look interesting. Here's how the main options stack up.
| Seed | Days to Sprout | Difficulty | Look and Feel | Notes |
|---|---|---|---|---|
| Alfalfa | 3 to 5 days | Easy | Thin, feathery pale-green sprouts | Very forgiving; tolerates slightly less moisture than chia |
| Radish | 3 to 6 days | Easy | Bright white stems, small green leaves | Faster and punchier-looking than chia; mild spicy smell |
| Wheatgrass | 5 to 8 days | Easy | Tall, vivid green blades | Grows thicker and taller than chia; impressive effect |
| Flax | 4 to 7 days | Easy to medium | Dense, fine green mat | Similar to chia; produces gel coating when wet which helps adhesion |
| Basil | 5 to 10 days | Medium | Broader, rounder leaves | Needs slightly warmer temps (70F+); smells great |
| Lentils | 4 to 6 days | Medium | Chunky sprouts, bean-like look | Heavier seeds; work better on flatter surfaces or top of figure |
| Mung beans | 3 to 5 days | Medium | Thick white shoots with yellow tips | Same caveat as lentils; gravity can pull them off angled spots |
| Clover | 4 to 6 days | Easy | Delicate, tripod-shaped sprouts | Looks whimsical; good for decorative figures |
If you want the easiest possible swap that behaves most like chia, go with alfalfa or flax first. Both are forgiving, sprout quickly, and produce a dense, attractive coat. Wheatgrass is the most dramatic visually but grows tall fast, so the figure can look a bit overgrown after 10 days. Basil is the most rewarding if you want something you can actually harvest and use in the kitchen, but it needs warmer conditions to really thrive.
How to prep the surface and choose the right seed
Start with a clean figure. If you've already grown chia or anything else on it, scrub the surface with warm water and a soft brush to remove any old root material or residue. Let it dry completely, then do the 30-minute full-submersion soak before you seed it. That pre-soak is non-negotiable regardless of which seed you're using.
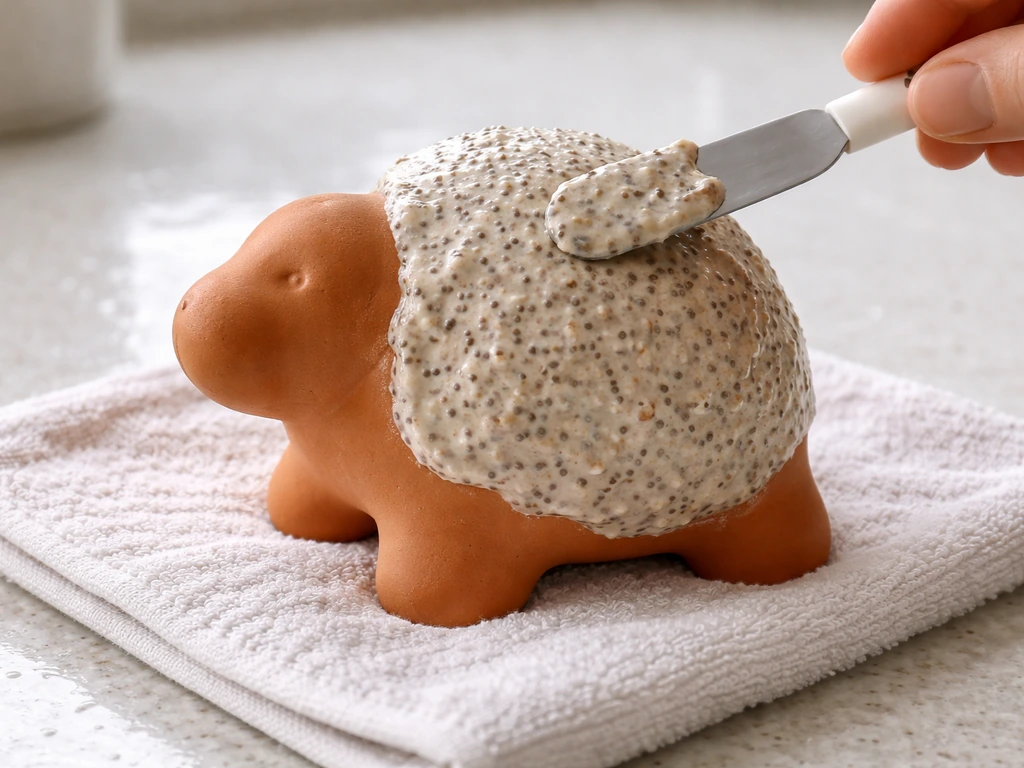
For seeds that don't naturally form a gel (like radish or wheatgrass), mix them with just enough water to create a spreadable paste similar to jam. The Chia.com instructions describe this as a 'jam-like consistency' where the seeds won't slide when you tilt the container. That ratio is your guide. If it's too watery, seeds run off the figure before they can grip. If it's too dry, the paste cracks and coverage is patchy. Aim for a mixture where seeds clump slightly but still spread with a butter knife or your finger.
For heavier seeds like lentils or mung beans, it helps to pre-soak the seeds for 8 to 12 hours before applying them. This softens the seed coat and encourages faster, more uniform germination. Apply them to flatter sections of the figure (the top, flat back, wide sides) rather than steep angled areas where gravity will work against you.
Step-by-step setup and care schedule
- Soak the Chia Pet fully submerged in room-temperature water for 30 minutes. This saturates the clay so wicking starts immediately after seeding.
- While it soaks, mix your seeds with water to a jam-like consistency. For a standard-sized figure you'll need about 2 teaspoons of small seeds (alfalfa, flax) or 1 tablespoon of larger seeds (radish, lentils).
- Remove the figure from the water and apply the seed paste evenly across the exterior using your fingertip or a small spatula. Press lightly so seeds make direct contact with the clay.
- Fill the internal reservoir with fresh water and place the figure on its drip tray. Put it in a spot that gets bright indirect light but not direct sun, which can dry the surface too fast.
- For days 1 to 3, check the surface twice a day. It should look visibly damp. If dry patches appear, mist lightly with a spray bottle rather than pouring water directly over the seeds.
- Refill the reservoir daily, or whenever it drops below halfway. Empty and rinse the drip tray every 2 days to prevent standing water from turning stagnant.
- By days 3 to 7 (depending on your seed choice), you should see sprouts pushing through. Once they're established, you can ease back to once-daily reservoir refills.
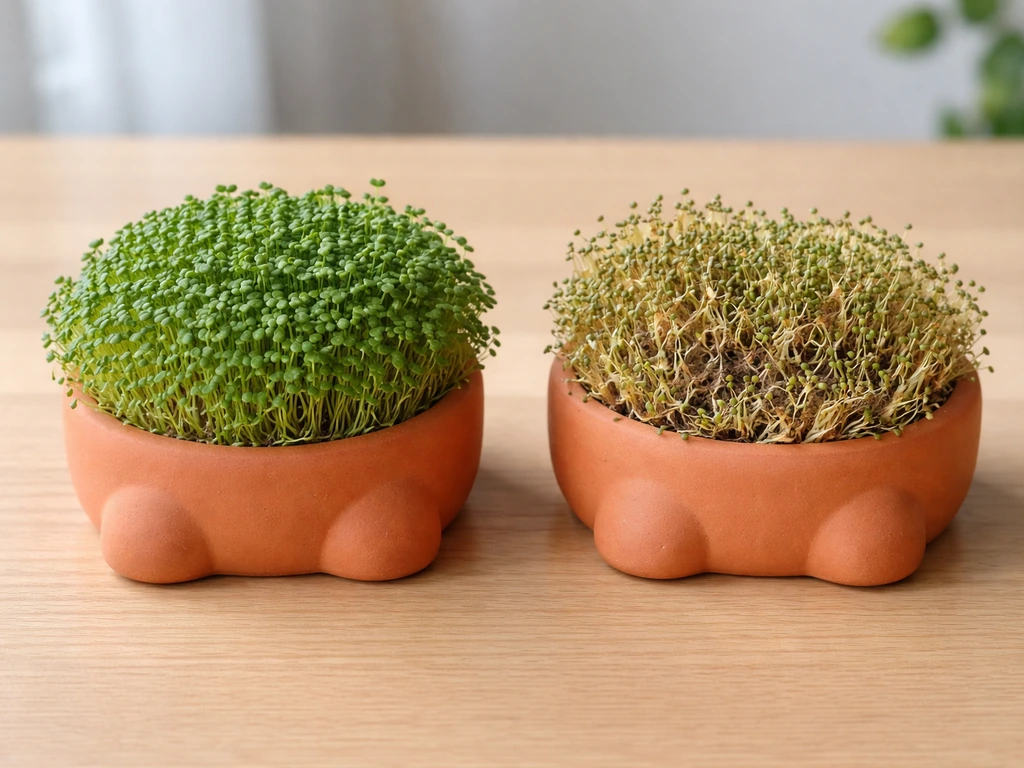
- Most seeds peak visually around days 7 to 14. After that, growth slows and the greens start to yellow or flop, which is your cue to harvest or reset.
Temperature matters more than most guides admit. Keep the figure somewhere consistently between 65 and 75 degrees Fahrenheit. Cold windowsills in winter can slow germination by several days. If your kitchen runs warm and sunny, you're in good shape for basil and radish. If it's cooler, stick with alfalfa and clover, which sprout reliably in a wider temperature range.
Common problems and how to fix them
Mold or bad smell
This is the most common failure. If you see white fuzzy growth (distinct from the white root hairs that are totally normal on sprouting seeds) or smell something sour, you have too much moisture and not enough airflow. Move the figure somewhere with gentle air circulation, reduce how often you refill the tray, and make sure the tray isn't sitting in a puddle. EFSA notes that dry contaminated seed is the most likely initial source of sprout-associated outbreaks, and that warm, humid sprouting conditions can allow pathogens to multiply Scientific Opinion on the risk posed by STEC and other pathogenic bacteria in seeds and sprouted seeds. White root hairs look wispy and grow close to the seed; mold looks cottony and spreads between seeds. If mold is established, rinse the surface gently with a 1-to-10 dilution of white vinegar and water, then let the figure breathe for a few hours before re-watering.
Seeds not sprouting
If nothing has happened after 7 days, the most likely culprits are seeds that are too old (check the expiration or pack date), a surface that dried out during the critical first 48 hours, or temperatures that are too cold. Try starting over with fresh seeds, making sure the clay stays visibly moist for the entire first week. Old seeds from a craft store Chia Pet kit that's been sitting in a drawer for years often have very low viability, which is worth testing by soaking 10 seeds in a damp paper towel for 48 hours before committing to a full setup.
Drying out too fast
If the surface feels dry within a few hours of watering, the clay may not be wicking efficiently. This usually means the reservoir isn't full enough, or the clay has a mineral buildup from hard tap water. Try using filtered or distilled water, and make sure you filled the reservoir completely after the initial soak. You can also cover the figure loosely with a plastic bag or a humidity dome for the first 3 days to keep the microclimate around the seeds moist while germination kicks off.
Thin or uneven coverage
Uneven growth almost always traces back to uneven seed application. Curved areas and recessed spots on decorative figures are hard to coat uniformly. Next time, apply the paste in thin layers, let it sit for 10 minutes, then add a second coat to bare spots. You can also rotate the figure 90 degrees every day or two so different sides face the light source, which evens out growth across the whole surface.
Safety tips and what not to grow on a Chia Pet
A Chia Pet sits in your kitchen or on your desk, and if you're growing edible sprouts, whatever you use needs to be food-safe. Stick to seeds sold specifically for sprouting or culinary use, because seeds sold for gardening are often treated with fungicides or pesticides that aren't safe to eat or even inhale as sprouts. This applies to radish, alfalfa, and wheatgrass just as much as anything else. Buy from a reputable sprouting seed supplier, not the garden center seed rack.
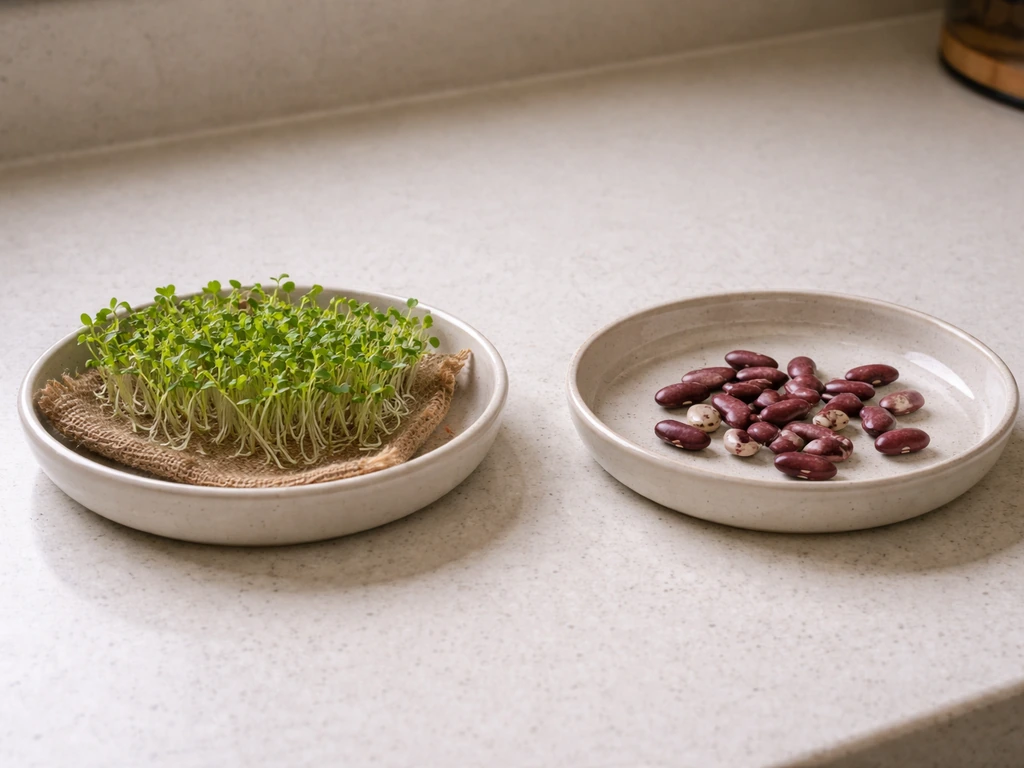
- Avoid raw kidney beans or other legumes that produce toxins when undercooked. Sprouting doesn't neutralize those compounds.
- Don't use ornamental seeds like morning glory, sweet pea, or foxglove. Many decorative plant seeds are toxic, and the sprouts concentrate those compounds.
- Skip any seed packet that doesn't specify it's safe for sprouting or human consumption, even if the plant itself is edible at maturity.
- Don't grow sprouts on a Chia Pet you plan to eat if the clay figure is old and cracked, since bacteria can harbor in deep fissures and contaminate the sprouts.
- If young children or pets are around, wheatgrass and alfalfa are the safest options. Avoid anything with a strong spicy compound (like mustard sprouts) near toddlers.
How to harvest or reset your Chia Pet after a growth cycle
Most sprouts are ready to harvest between days 7 and 14. For edible varieties like alfalfa, radish, or wheatgrass, just snip them at the base with clean scissors right before you want to use them. Rinse the cut greens under cold water and eat them fresh. They don't store well once harvested from the surface, so cut only what you need.
When the cycle is done (either harvested or the greens have yellowed and started to decline), remove remaining growth by rinsing the figure under warm running water and scrubbing gently with a soft-bristle brush. Let the clay dry out completely in the open air for 24 to 48 hours before you start a new cycle. Full drying between cycles helps prevent mold from carrying over and gives you a clean slate for the next batch. If you're switching seed types, do a longer soak on the second cycle, about 30 to 45 minutes, since previously used clay sometimes wicks less consistently.
One thing worth knowing: you can run 4 to 6 cycles on the same Chia Pet before the clay starts to degrade noticeably. After that, you might notice the surface staying damp for shorter periods or mineral deposits building up. A 30-minute soak in a 1-to-20 white vinegar and water solution (then a thorough fresh-water rinse) can dissolve most mineral buildup and extend the figure's useful life considerably. After that reset, it sprouts just as reliably as it did the first time.
If you enjoy growing things in unconventional containers, it's worth knowing that the principles here, keeping a porous surface moist, using fast-sprouting seeds, managing airflow and light, apply to other creative growing setups too. Some of the same ideas also apply when growing other ancient-style sprouted crops, like asking what the Anasazi grew in their region. Those same basics also help answer whether you can mimic a chinchilla’s needs by setting up a mini garden-like environment other creative growing setups. The same thinking that works for a terra cotta Chia Pet translates well to repurposed chimineas used as planters, where drainage and moisture retention are equally central to success.
FAQ
What kinds of seeds are most likely to work, even if they are not chia?
If a seed can germinate on a moist, gel-like surface, it usually works. Your best candidates are sprouting seeds sold for eating that naturally form a mucilaginous coating (or become sticky when mixed into a jam-like paste). Avoid seeds that stay hard, have thick husks, or are sold as decorative or novelty plantings unless they are specifically labeled for sprouting or culinary use.
Can you grow seeds on a Chia Pet in a dry climate or during winter? What changes should I make?
Yes, but only if you can keep the reservoir and surface reliably moist during the first 48 to 72 hours. A humid cover (loose plastic bag or dome) can help, but do not seal it airtight, and be sure there is gentle airflow later to prevent sour smells or mold. Also check more often, because clay that dries faster in low humidity will stall growth.
How do I avoid “too wet” conditions that cause mold or sour smells?
Overfeeding or over-misting is a common mistake. The goal is visible moisture in the seed layer, not water pooling or dripping. If the paste is runny, seeds slide off, and if it is too watery after germination starts, airflow and airflow timing become critical to avoid mold. A jam-like paste consistency before pressing is the simplest way to prevent both problems.
How should I harvest edible sprouts from the Chia Pet, and can I store them?
Use clean scissors, and cut right at the base of the sprouts. Rinse under cold water only if you see residue, then eat promptly. If you want to store, keep sprouts in a breathable container in the fridge, but expect quality to drop quickly because Chia Pet sprouts are not grown in soil and lose crispness fast after cutting.
Is it safe to use regular garden seeds if I am not planning to eat the sprouts?
You should not. Seeds treated for gardening use may be coated with fungicides or pesticides, and those residues can be a safety risk if sprouts are for eating (or even if you will breathe the sprout dust). If you want to grow something on the surface and discard it, you still might prefer food-safe sprouting seeds to reduce irritation from treated seed coatings.
What should I do if the clay dries out quickly even though I refilled the tray?
Watch the surface feel rather than just the tray level. If the clay feels dry soon after watering, the wicking path may be blocked by mineral deposits or the reservoir may not be filled after the initial soak. Filtered or distilled water helps with minerals, and a full reservoir refill after the 30-minute soak is usually the fix.
What is the fastest way to troubleshoot when no sprouts appear after 7 days?
If nothing happens after a week, start with seed viability. Do a quick germination test by soaking a small number of seeds (for example 10) in damp paper towels for about 48 hours, then compare results. Even fresh-seeming seeds can have low viability if they were stored poorly or are older craft-store stock.
Why does my Chia Pet grow patchy or only on certain areas, and how can I correct it next cycle?
Uneven growth usually comes from uneven coating, not from the seed choice. Re-apply by adding a second thin layer only on bare spots (after the first layer sits briefly) and rotate the figure periodically so different areas get consistent indirect light. Curved, recessed, or highly angled sections need extra attention during application.
Can I mix different seed types (for example radish and flax) on the same Chia Pet?
Yes, but it is harder to do well on a Chia Pet because many seeds produce different root habits and require consistent moisture gradients. If you try multiple varieties, use seeds with similar sprout speed and similar moisture preference, and keep the same jam-like paste approach. Otherwise, faster sprouters can crowd out slower ones before you get a uniform “coat.”
What should I do if my home temperature is outside the ideal range?
The listed target temperature is mainly about consistent germination, so do not overcorrect with extremes. If your room is cooler than ideal, choose more tolerant varieties (like alfalfa or clover) and consider a gentle humidity dome for the first few days, then remove it to restore airflow. If your room is warmer, monitor more frequently because the seed layer can dry out sooner.
Does switching seed types require extra prep or soaking?
If you are switching from one seed type to another, a longer soak helps because previously used clay may wick less consistently. Plan on the second-cycle longer soak, then clean any old residue gently. Also reset the moisture baseline by ensuring the seed layer stays visibly moist, not cracking, during the entire first week.
How should I clean the Chia Pet between cycles to prevent problems next time?
A good rule of thumb is to rinse and scrub after the cycle ends even if nothing was harvested. Removing remaining growth early reduces organic residue that can feed mold, and drying the clay fully between cycles improves performance. If you skip the complete dry-out, you will often see faster mold or poorer wicking the next time.
Next Article
What Did the Aztecs Grow on Chinampas? Main Crops and How to Replicate Them
Aztecs grew maize, beans, squash, chilies, tomatoes and more on chinampas; learn conditions and how to replicate it.