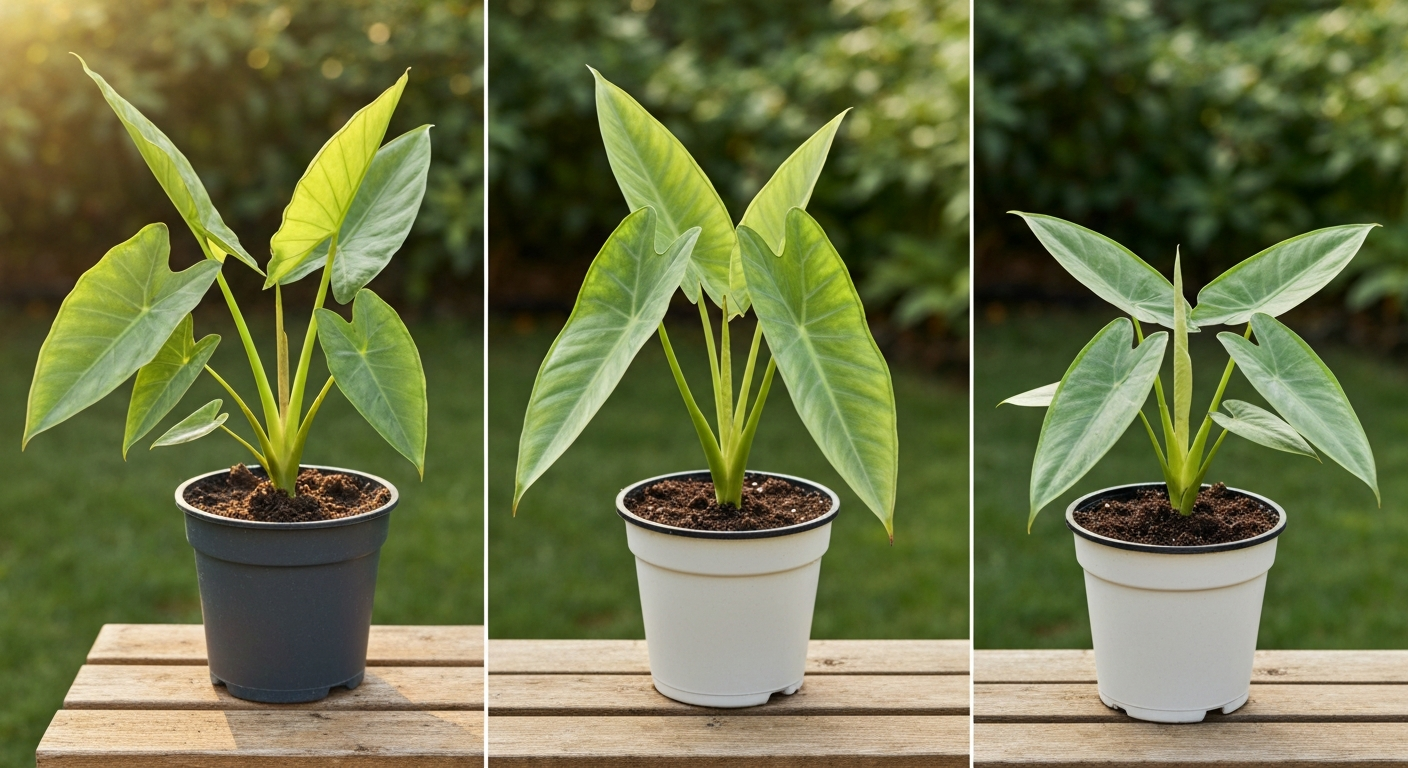
Elephant ear plants stall or stop growing for a handful of very fixable reasons: wrong light levels, temperatures that are too cold, inconsistent watering, poor soil drainage, nutrient deficiency, pest or disease pressure, or simply natural dormancy kicking in. The frustrating part is that all three genera sold as 'elephant ears' (Colocasia, Alocasia, and Xanthosoma) look similar in a garden center but behave differently, so the fix that works for one may not suit another. Walk through the checks below in order and you will almost always land on the culprit within a single afternoon.
Why Won't My Elephant Ear Plant Grow? Troubleshoot & Fix

Marcus Weir
18 Jul 2026
Why elephant ears stop growing (the short version)
Before diving into the step-by-step workflow, it helps to understand what you are actually growing. For a quick primer on identifying which type of elephant ear you have, see what type of plant is elephant ear grow a garden. 'Elephant ear' is a catch-all name applied to three different aroid genera: Colocasia (true taro), Alocasia, and Xanthosoma. Colocasia is the classic pond-side giant that tolerates wet feet and thrives in full sun to part shade, reaching 3 to 6 feet tall. Alocasia species are native to the Asia-Pacific and prefer bright filtered light with well-draining, aerated soil. Xanthosoma sits somewhere between the two in its preferences. Knowing which one you have matters because the right diagnosis for a waterlogged Colocasia is very different from one for a bone-dry Alocasia sitting in a dark corner.
Quick diagnostic checklist before you do anything else
Run through these checks first. They take about five minutes and will narrow the problem down immediately. Write down what you observe because patterns across several symptoms point directly to the cause.
- Visible symptoms: yellowing leaves, brown leaf edges, drooping or mushy stems, tiny insects on undersides, white powdery patches, or simply no new leaves emerging for more than 4 to 6 weeks during the growing season
- Recent changes: did you move the plant, change watering frequency, repot it, add fertilizer, or has the season shifted in the last 4 to 8 weeks?
- Pot and soil check: lift the pot — is it heavy (waterlogged) or very light (bone dry)? Push a finger 1 to 2 inches into the mix and feel for moisture
- Root and corm check: if the plant is in a pot, gently tip it out and look for firm, cream-colored roots (healthy) versus brown, mushy, or absent roots (rot)
- Location check: note how many hours of direct or bright indirect light the plant receives per day
- Temperature check: what is the lowest temperature at that spot, especially at night or in winter? Has it dropped below 50 to 60°F (10 to 15°C)?
- Season check: is it late autumn or winter? Dormancy is a normal and reversible cause of stopped growth
- Genus check: do you know whether you have a Colocasia, Alocasia, or Xanthosoma? Check the tag or search the leaf shape — Colocasia leaves point downward at the attachment point, Alocasia leaves point upward
How to follow this troubleshooting guide
Work through the sections below in sequence. Each one addresses a single category of problem, gives you a quick test to confirm whether that category is the issue, and then tells you exactly what to change and what to expect in terms of recovery time. Do not skip ahead to fertilizing or repotting before you have ruled out light, temperature, and water, those are the three most common causes, and adding fertilizer to a stressed or waterlogged plant almost always makes things worse.
- Check light first — it is the most commonly overlooked indoor cause
- Check temperature and location — cold stress mimics several other problems
- Check watering — overwatering is more common than underwatering in containers
- Check soil and drainage — a great plant in bad soil will never thrive
- Check nutrients — only fertilize once light, temperature, and water are correct
- Check for pests and disease — inspect closely before writing off the plant
- Consider dormancy and tuber health — the corm may be fine even when there are no leaves
- Decide: fix, repot, divide, or replace
Light problems: the most common indoor culprit
Insufficient light is consistently the number-one reason a potted Alocasia sits frozen in place while an outdoor Colocasia in full sun puts out a new leaf every week. The mismatch between genus and light level is the first thing I look at. Colocasia wants full sun to part shade outdoors with reliable soil moisture. Alocasia wants bright, filtered light and will tolerate neither deep shade nor hours of harsh afternoon direct sun, which scorches the leaves. Xanthosoma falls somewhere between the two.
How to measure light properly
Vague descriptions like 'bright spot' mean very different things in different homes and at different times of year. Extension guidance from university horticulture programs recommends using a light meter at leaf height rather than guessing. A practical working range for foliage plants like Alocasia is roughly 300 to 2,000 foot-candles (approximately 3,200 to 21,500 lux) of bright indirect light. You can get a basic lux meter for under $20 or use a free smartphone app as a rough guide. Hold the sensor at the leaf surface and take readings at the time of day when the spot is brightest. If you are consistently below 300 foot-candles, the plant is in dim light and will not grow meaningfully regardless of everything else you do.
Signs and fixes for each light problem
| Problem | Signs | Fix | Expected timeline |
|---|---|---|---|
| Too little light | No new growth, small pale leaves, leggy petioles stretching toward window | Move to a brighter spot or add a grow light 12–14 hours/day | New leaf bud visible in 3–6 weeks once temperatures are also warm |
| Too much direct sun (Alocasia) | Bleached or brown scorched patches on leaf surface | Filter with a sheer curtain or move back from glass by 2–3 feet | Existing damage does not reverse; new growth emerges healthy in 2–4 weeks |
| Seasonal light drop (winter) | Growth slows or stops in autumn/winter; plant otherwise looks fine | Supplement with a full-spectrum grow light, or accept dormancy and resume care in spring | Active growth returns as day length and light intensity increase in spring |
Temperature and location: cold is a silent growth killer
Elephant ears are frost-tender tropicals. Alocasia and Colocasia are generally rated for USDA hardiness zones 8A to 11, which means sustained temperatures below about 50 to 60°F (10 to 15°C) will slow growth dramatically and, if prolonged, trigger dormancy or kill the plant outright. I have had potted Alocasias sitting right next to an air conditioning vent look perfectly positioned light-wise but refuse to put out a single new leaf because cold drafts were hitting them every time the AC cycled. The same thing happens when plants are placed near a drafty window or on a cold tile floor in winter.
The comfortable active-growth range for most elephant ears is 65 to 85°F (18 to 29°C). Below that range, metabolic processes slow. Large day-to-night temperature swings of more than 15 to 20°F compound the problem even if daytime temperatures seem fine. Outdoors, watch for microclimates: a spot that receives reflected heat from pavement may be fine in summer but drop into cold-stress territory fast in autumn even before the first frost.
Indoor vs. outdoor placement decisions
- Indoors: keep away from AC vents, exterior doors, and single-pane windows in winter; use a digital thermometer at the plant's location to check nighttime lows
- Outdoors in containers: move pots to a sheltered wall-facing south when temperatures approach 55°F at night; container soil cools much faster than in-ground soil
- In-ground outdoors: in zones 7 and colder, dig corms before first frost and store dry at 50 to 60°F; do not expect in-ground growth to resume until soil temperatures reach 60°F or above in spring
- Greenhouse or heated sunroom: ideal for overwintering and maintaining slow growth through winter months
Watering problems: too much is usually worse than too little
The two genera behave very differently with water, and that catches a lot of people out. Colocasia evolved in wet tropical environments and actually tolerates waterlogged soil, it is often planted at pond margins. Alocasia, by contrast, wants consistently moist but well-draining, aerated media. Planting an Alocasia in the same soggy conditions you would use for a Colocasia is one of the fastest ways to rot the corm and kill it. Xanthosoma generally prefers the moist-but-draining approach closer to Alocasia.
Diagnosing overwatering vs. underwatering
| Condition | Leaf symptoms | Soil/root signs | Corrective action |
|---|---|---|---|
| Overwatering (Alocasia/Xanthosoma) | Yellowing lower leaves, soft drooping petioles, mushy base | Waterlogged mix, brown slimy roots, possible fungus gnats | Stop watering, let soil dry partially, check for root rot and trim affected roots, repot into well-draining mix |
| Underwatering | Drooping leaves that still feel firm, dry brown leaf tips and edges, crispy texture | Very light pot, bone-dry mix 2 inches down | Water thoroughly until it drains from the bottom, then establish consistent watering schedule |
| Overwatering (Colocasia) | Less likely to show rot symptoms at roots if soil is moist but not stagnant; yellowing if kept in anaerobic standing water without flow | Check that standing water is not stagnant — some flow or aeration helps | Ensure water moves rather than sitting completely still around roots |
| Root rot (severe overwatering) | Wilting that does not recover after watering, rapid yellowing across the whole plant | Mushy or absent corm, roots fall apart when touched | Remove all rotted tissue, treat with a dilute hydrogen peroxide rinse or copper-based fungicide, repot in fresh sterile mix |
A practical diagnostic I use every time: lift the pot before watering. A light pot means the soil is drying out and it is probably time to water. A heavy pot means moisture is still in the mix and you should wait. You can also push a finger or a wooden chopstick 1 to 2 inches into the soil, if it comes out with moist mix clinging to it, hold off. The University of California publication Happy, Healthy Houseplants recommends lifting pots, probing 1–2 inches into the mix, or using a moisture meter to diagnose drainage and watering problems The University of California publication Happy, Healthy Houseplants recommends lifting pots, probing 1–2 inches into the mix, or using a moisture meter to diagnose drainage and watering problems.. Moisture meters are a cheap and useful addition if you have several plants to manage.
Soil, drainage, and mulching: the foundation of healthy growth
Even perfect watering habits cannot compensate for a bad growing medium. Elephant ears need a nutrient-rich, organic, moisture-retentive mix that still drains freely enough to keep roots oxygenated. Penn State Extension recommends using a soilless or bark‑amended organic mix (organic matter plus perlite, pumice, or orchid bark) to hold moisture while maintaining aeration and preventing anaerobic conditions Monstera as a Houseplant (Penn State Extension) — guidance on soilless, well‑draining organic mixes (applicable to aroids). Dense, compacted, or peat-heavy mixes are a real problem: they hold so much water that the root zone becomes anaerobic, which promotes water-mold pathogens like Pythium and shuts down root function. I have made this mistake myself using a budget potting mix straight from the bag, the plants just sat there for two months.
Ideal potting mix for containers
For Alocasia and Xanthosoma in pots, a mix that many experienced growers land on looks something like this: 50 to 70% quality potting compost, 20 to 30% coarse orchid bark, and 5 to 15% perlite or pumice. That combination holds enough moisture to keep the roots from drying out between waterings while the bark and perlite create air pockets that prevent anaerobic conditions. For Colocasia in containers, you can use a heavier, more moisture-retentive mix, a standard quality potting compost with added organic matter and less bark amendment will work fine.
Soil pH
pH is easy to overlook but matters for nutrient availability. For ornamental tropicals including aroids, a slightly acidic to near-neutral range of roughly 5.5 to 7.0 is ideal. Outside that range, nutrients like iron and manganese become less available even when they are physically present in the soil, which can show up as interveinal chlorosis (yellowing between the leaf veins with green veins remaining). A basic soil pH test kit from a garden center costs a few dollars and can rule this out quickly.
Drainage testing for garden beds
If you are planting or have planted in a garden bed and suspect poor drainage, do a simple percolation test: dig a hole about 12 inches deep, fill it with water and let it drain completely to saturate the surrounding soil, then refill it and time how fast the water level drops. A healthy draining soil drops roughly 1 inch per hour. If it takes several hours per inch, the drainage is poor and you will need to raise the bed, amend with coarse material, or choose a better-draining site. Waterlogged soil is one of the fastest ways to stall or kill an otherwise healthy elephant ear corm.
Will elephant ears grow through mulch?
Mulching around elephant ears is generally beneficial, a 2 to 3 inch layer of organic mulch helps retain soil moisture, regulate soil temperature, and suppress weeds. The question of whether emerging shoots can push through that mulch layer is a practical one, especially in spring when corms are breaking dormancy. Healthy, vigorous corms will generally push through a light mulch layer of 2 to 3 inches without issue. A very thick or compacted mulch layer (4 inches or more, especially of fine-textured material like grass clippings that mat down) can slow or redirect emerging shoots. If your spring growth is later than expected, gently pull back mulch from directly over the corm planting area to give the first shoots an easier path up. For a focused answer, see the section titled "Will elephant ears grow through mulch?".
Nutrient needs and fertilizing: what elephant ears actually need
Elephant ears are heavy feeders during their active growing season. They are putting out large, metabolically expensive leaves and need a steady supply of nitrogen for leaf production, phosphorus for root and corm development, and potassium for overall plant health and disease resistance. A plant that has adequate light, the right temperature, and correct watering but still produces small, pale leaves with slow growth is often running low on nutrients, particularly nitrogen.
When to fertilize and when to hold off
Only fertilize during the active growing season, which is roughly spring through early autumn in most climates. Fertilizing a dormant plant or one that is cold-stressed does nothing useful and can cause salt buildup in the soil. For outdoor plants, begin feeding once soil temperatures are consistently above 60°F and you can see active growth. For indoor plants, feed from late winter or early spring through summer. Reduce or stop feeding as days shorten in autumn.
Can you use Miracle-Gro on elephant ears?
Yes, you can use Miracle-Gro on elephant ears, and it works reasonably well as a general-purpose option. The standard Miracle-Gro All Purpose water-soluble fertilizer (24-8-16) provides a nitrogen-heavy formulation that suits the heavy foliage growth habit of elephant ears. Mix it at the label rate, typically about 1 tablespoon per gallon of water, and apply every 1 to 2 weeks during active growth for outdoor plants, or every 2 to 4 weeks for indoor plants where growth is slower. The key caution is to never apply it to dry soil or a stressed plant: always water the plant thoroughly first, then apply the diluted fertilizer solution to avoid root burn. Start at half the label rate on younger plants or recently repotted specimens. For a focused discussion on whether Miracle-Gro is the right choice and how to apply it safely, see Is Miracle-Gro good for elephant ears.
Whether Miracle-Gro is the best choice depends on your situation. It is convenient and widely available, but it is a synthetic, water-soluble fertilizer with relatively little impact on long-term soil biology. If you are growing in-ground in a garden bed, alternating with a slow-release granular fertilizer (like Osmocote 14-14-14) or supplementing with organic options like fish emulsion, worm castings, or composted manure will improve soil structure and microbial activity over time. For container plants, a balanced liquid fertilizer (anywhere from 10-10-10 to 20-10-20 range) applied consistently is usually more important than the specific brand.
Fertilizer options at a glance
| Fertilizer type | Best use case | Application rate/frequency | Notes |
|---|---|---|---|
| Miracle-Gro All Purpose (24-8-16) | Containers and in-ground during active growth | 1 tbsp per gallon water, every 1–2 weeks outdoors; every 2–4 weeks indoors | Apply to pre-moistened soil; start at half strength on stressed plants |
| Slow-release granular (e.g., Osmocote 14-14-14) | In-ground beds and large containers | Apply at label rate at planting and every 3–4 months in season | Reduces risk of over-fertilizing; good for low-maintenance setups |
| Fish emulsion or liquid kelp | Any setting where soil biology improvement is a goal | Dilute to label rate, every 2–3 weeks in season | Lower NPV analysis numbers but adds micronutrients and supports soil life |
| Worm castings or composted manure | In-ground or top-dressed into containers | Work into top 2–3 inches of soil at planting or as a seasonal top dressing | Gentle, low burn risk; improves soil structure alongside nutrition |
Pests and disease: small problems that cause big growth slowdowns
A surprising number of 'why won't it grow' questions are actually pest or disease problems in disguise. The plant is spending its energy defending itself rather than producing new leaves. The most common culprits on elephant ears are spider mites, mealybugs, aphids, and scale insects for pests, and root rot (usually Pythium or Phytophthora) and bacterial soft rot for diseases. Fungus gnats are common in overwatered containers and while the adults are mainly a nuisance, their larvae can damage fine roots.
How to check for pests
Flip leaves over and look at the undersides with a magnifying glass or your phone camera zoomed in. Spider mites produce fine webbing and tiny moving dots. Mealybugs look like cottony white clusters, usually at leaf axils and petiole junctions. Scale insects appear as brown or tan bumps on stems and petioles that do not brush off easily. Aphids cluster on new growth and leave a sticky honeydew residue. For any of these, begin with a strong blast of water to knock off the population, then apply insecticidal soap or neem oil at 7-day intervals for at least three treatments. Systemic options like imidacloprid can be used for severe scale infestations in ornamental settings.
Root rot and bacterial problems
If you pull the plant from its pot and find that roots are brown, slimy, and fall apart when touched, or the corm base is soft and foul-smelling, you are dealing with root rot. Cut all affected material back to firm, healthy tissue using sterile scissors. Rinse the healthy roots in a dilute hydrogen peroxide solution (1 part 3% hydrogen peroxide to 4 parts water) to kill residual pathogens, then repot into fresh, sterile, well-draining mix. Do not reuse the old mix. Recovery is possible if at least a portion of the corm is still firm and healthy, but it requires patience, expect 4 to 8 weeks before new growth resumes, provided conditions are corrected.
Dormancy and tuber health: when not-growing is normal
This is probably the most misdiagnosed 'problem' I see. Every autumn I get questions from people convinced their elephant ear is dying when it is simply going dormant. Reduced day length and cooling temperatures are the primary signals that trigger both Alocasia and Colocasia corms and rhizomes to withdraw resources and stop producing leaves. The plant pulls carbohydrates back down into the corm, the leaves yellow and die back, and the above-ground portion disappears entirely. This is a normal survival response, and the corm underground is almost certainly fine.
Before concluding that a dormant plant is dead, dig carefully around the corm and press it gently. A healthy dormant corm is firm throughout, cream to tan in color, and may show small dormant buds. A dead corm is mushy, hollow, or entirely black and foul-smelling. If the corm is firm, store it in a cool dry location (50 to 60°F) in barely moist peat or vermiculite over winter if you are in a cold climate, or leave potted plants in a warm indoor spot with reduced watering and wait for spring. Growth typically resumes within 4 to 6 weeks of returning to warm temperatures and longer day length.
When to repot, divide, or replace
A plant in a pot that is dramatically root-bound (roots circling the base of the pot or pushing out of drainage holes) can stall growth even when all other conditions are right. The root mass fills the container so thoroughly that there is almost no growing medium left to hold water and nutrients. In this case, repotting up one pot size (not more than 2 inches larger in diameter at a time) in spring is the right move. A pot that is too large is the opposite problem: excess soil holds too much moisture around the relatively small root zone and promotes rot.
Division is a useful tool when a large clump has been growing in the same spot for several years and new growth has visibly slowed even in good conditions. Dig the clump in early spring before the growing season begins, separate offsets that have their own roots and at least one growing tip, and replant at the same depth. This rejuvenates the planting and gives you extra plants in the process. Replacement makes sense when the corm is completely rotten, when persistent root rot keeps returning despite corrections, or when the variety you have simply is not suited to your climate or indoor conditions.
Growth timeline: what to realistically expect
Recovery is rarely instant, and unrealistic expectations are a source of unnecessary panic. Here is a realistic timeline once the root problem (pun intended) has been corrected:
| Scenario | Time to see new growth | Time to full recovery |
|---|---|---|
| Light and temperature corrected for indoor Alocasia | 3–6 weeks for a new bud to appear | 2–4 months for full, vigorous leaf production |
| Watering corrected (overwatering without rot) | 2–4 weeks | 6–10 weeks |
| Root rot treated and repotted | 4–8 weeks for new root and shoot growth | 3–6 months to fully recover vigor |
| Dormancy (winter) — conditions improved or spring arrives | 4–6 weeks after warming up | Full growth resumes within one growing season |
| Pest treatment completed | 2–3 weeks for new growth once pest pressure is resolved | 6–8 weeks for the plant to look visibly healthy again |
| Repotted root-bound plant | 2–4 weeks | One full growing season to fill the new pot and resume strong growth |
Common myths worth clearing up
- Myth: more fertilizer will fix a slow-growing elephant ear. Fact: fertilizer does not fix light, temperature, or watering problems and can cause root burn in an already stressed plant
- Myth: if all the leaves have died, the plant is dead. Fact: a firm, healthy corm underground can re-sprout reliably when conditions improve — always check the corm before discarding
- Myth: elephant ears need the same care regardless of which type you have. Fact: Colocasia, Alocasia, and Xanthosoma have meaningfully different light, water, and soil needs — genus identification is a critical first step
- Myth: a bigger pot always helps a struggling plant. Fact: oversized pots hold excess moisture around a small root zone and often worsen rot problems rather than solving them
- Myth: elephant ears always need shade indoors. Fact: Alocasia specifically needs bright filtered light — a genuinely bright window or grow light is usually necessary for active growth indoors
FAQ
What are the most common reasons an elephant ear (Colocasia/Alocasia/Xanthosoma) stops growing?
Common causes are wrong species for the site (different genera have different light/ moisture needs), insufficient light, unsuitable temperature or seasonal dormancy, incorrect watering (too wet or too dry), poor soil/compaction or bad drainage, nutrient shortfall or excess, pests and diseases (root rot, borers, mites), damaged or rotting tubers/corms, and pot‑bound roots or incorrect potting mix.
How do I quickly identify whether the problem is seasonal dormancy or a true health issue?
Check time of year and temperature: if it’s late fall/winter with shorter days and temps below ~60°F (15°C) many aroids slow or enter dormancy — leaves yellow and drop but the corm/rhizome is usually firm. If dormancy is likely, raise light and temperature, reduce watering, and wait until spring. If it’s warm/long‑day and growth hasn’t resumed, inspect tuber firmness, roots and for symptoms of pests/disease — that indicates a health problem needing action.
What light conditions do the different elephant ear genera prefer and how do I measure light properly?
Colocasia generally tolerates and often prefers fuller sun to part shade outdoors (variety‑dependent), while Alocasia prefers bright, filtered/indirect light; Xanthosoma sits between the two. Use a light meter or a phone lux app at leaf height: bright indirect spots for many aroids are roughly 300–2,000 foot‑candles (≈3,200–21,500 lux). If readings are below that for an Alocasia, move it to a brighter spot; if Colocasia in deep shade outdoors is small, try a sunnier site.
How do I diagnose watering and drainage problems in pots and in the landscape?
Pots: lift the pot to feel weight, probe 1–2 in. down with a finger or use a moisture meter. If the mix stays waterlogged (heavy, cold, foul smell) roots can rot; if it dries rock‑hard the plant is underwatered. Landscape: dig to root depth and check moisture; perform a simple percolation/drainage test by filling the hole, timing how fast water drains (slow drainage indicates poor site drainage). Adjust based on findings: improve mix or drainage or change irrigation.
What immediate corrective actions should I take for overwatering or root rot?
Stop frequent surface watering, remove the plant from the pot, gently inspect roots and tuber. Trim black, mushy roots and soft rotted portions of corm with sterile tools. Repot into a fresh, well‑draining aroid mix (potting compost + coarse bark + perlite/pumice). Allow slightly drier surface before resuming light, balanced watering. If rot is advanced, consider salvaging healthy pieces of the tuber or replacing the plant.
What soil or potting mix should I use to restore growth?
Use a nutrient‑rich, moisture‑retentive but airy mix: roughly 50–70% quality potting mix + 20–30% coarse orchid bark + 5–15% perlite or pumice. Avoid heavy, peat‑only or compacted soils that stay anaerobic. Check pH — aim for about 5.5–7.0. For Colocasia grown in the landscape, amend soil with compost and improve drainage pockets if needed.
Next Article
Is Miracle-Gro Good for Mandevilla? How to Feed It Safely
Yes, Miracle-Gro can feed mandevilla safely. Get correct NPK choice, dilution, schedule, and signs to avoid burn.